

Key takeaways
- Direct wall mounting: Use for 1–2 inch panels when wall space is limited. It is simple and compact, but gives less low-frequency benefit.
- Spaced mounting: Use cleats, standoffs, or a frame to create a 1–2 inch air gap behind the panel. This is one of the most useful upgrades for thicker panels.
- Ceiling cloud: Suspend a panel horizontally above the bar seating or speakers. A cloud treats reflections from the ceiling and can reduce the hard, noisy quality created by stone counters and tile floors.
- Freestanding panels: Use movable screens in open-plan rooms or rentals. They can divide the bar from the living area and be repositioned for parties.
- Adhesive mounting: Suitable only when the manufacturer approves it and the panel is light enough for the surface. Adhesive can damage paint and is a poor choice for heavy panels or textured walls.
The best acoustic panel for home bar room use is usually a 2-inch-thick, fabric-wrapped fiberglass or mineral-wool panel with an NRC of about 0.85–1.00, covering roughly 20–30% of the room’s wall and ceiling area; choose 4-inch panels when bass, loud music, or an open-plan layout is the main problem.
Our top picks

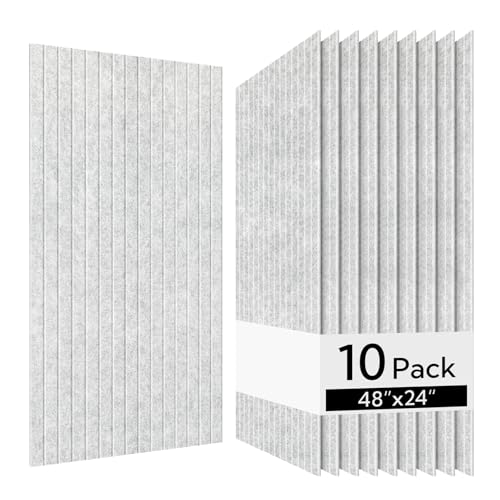


As an Amazon Associate we earn from qualifying purchases at no extra cost to you. Ratings are shown as listed on Amazon.
Best acoustic panels for common home bar layouts
A home bar is acoustically difficult because it combines hard, reflective surfaces: glassware, bottles, stone or laminate counters, tile, cabinetry, and sometimes a concrete floor. The right solution depends less on the product name than on panel thickness, total coverage, placement, and whether sound is staying inside the bar or traveling into adjoining rooms.
| Home bar situation | Recommended panel | Starting coverage | Best mounting approach | Typical material budget |
|---|---|---|---|---|
| Small enclosed bar, occasional use | 1–2 in fabric-wrapped fiberglass, NRC 0.80–0.95 | 15–20% of wall area | Direct wall mounting | $250–$600 |
| Regular entertaining, hard surfaces | 2 in fiberglass or mineral wool, NRC 0.85–1.00 | 20–30% of wall and ceiling area | Wall panels plus ceiling cloud | $500–$1,200 |
| Loud music, karaoke, or adjacent bedrooms | 3–4 in panels, preferably with a 1–2 in air gap | 30–40% of available surfaces | Spaced wall panels and suspended ceiling clouds | $900–$2,000+ |
| Open-plan bar connected to a living room | 2–4 in panels plus freestanding acoustic partitions | 25–35% of the bar zone | Mixed wall, ceiling, and partial-height treatment | $700–$1,800 |
Our top choices by buying priority
Best overall: 2-inch fabric-wrapped fiberglass panels
For most home bars, a 2-inch panel is the sensible balance of absorption, appearance, weight, and cost. Panels made from rigid fiberglass or mineral wool generally absorb mid and high frequencies well, reducing clatter from glasses and reducing the harshness of conversation and music.
Look for an independently reported NRC of at least 0.85. Brands such as GIK Acoustics, ATS Acoustics, and Acoustimac offer fabric-wrapped acoustic panels in this general category, with multiple fabric and size options. Exact ratings vary by thickness, fabric, air gap, and test method, so compare the specification sheet for the particular size rather than relying only on the brand name.
Choose rectangular panels measuring approximately 24 by 48 inches for efficient wall coverage. A set of six covers 48 square feet, enough to make a noticeable difference in a small, enclosed bar when placed at reflection points rather than clustered behind the bottles.
Best for bass and loud entertainment: 4-inch broadband panels
Four-inch broadband panels are the better choice when the bar contains a subwoofer, karaoke speakers, or a large television sound system. They absorb deeper frequencies than thin foam or 1-inch decorative panels, although they will not make the room soundproof or stop bass from passing through a shared wall.
GIK Acoustics’ thicker broadband panel range and similar products from other acoustic-treatment manufacturers are appropriate examples of this category. A useful specification is an NRC near 1.00, but NRC alone does not describe low-frequency performance. For music-heavy rooms, check whether the manufacturer publishes absorption coefficients at 125 Hz and 250 Hz.
Mounting a 4-inch panel with a 1–2 inch air gap improves low-frequency absorption. The gap effectively increases the panel’s acoustic depth without requiring a much thicker product.
Best for a polished interior: decorative PET-felt panels
PET-felt panels suit a visible bar area where conventional studio-style panels would look out of place. They are lightweight, can be cut into geometric patterns, and are available from commercial acoustic brands such as Autex Acoustics and Baux. Their performance varies considerably by thickness and shape.
Use 12–24 mm PET felt for echo control and visual design, but do not expect a thin decorative panel to handle subwoofer bass. For a noisy bar, combine decorative felt on the most visible wall with thicker fiberglass panels on the ceiling or behind the seating area.
Best for a small budget: targeted 1-inch or 2-inch panels
Budget treatment works when it is placed carefully. Instead of covering one wall with inexpensive foam, use a smaller number of properly rated panels at the first-reflection points, on the wall opposite the speakers, and above the main conversation area.
Acoustic foam can reduce high-frequency reflections, but it is often less effective than dense fiberglass or mineral wool at the same visual thickness. It can also collect dust and may be more vulnerable to tearing, denting, or discoloration near a busy counter. Do not place exposed foam close to heat sources, candles, cooking equipment, or electrical fixtures unless its fire rating is clearly documented.
How much coverage does a home bar need?
Start with the room’s total surface area, then treat only the surfaces that contribute most to the reflections. For a rectangular room, calculate wall area as:
Wall area = 2 × (room length + room width) × ceiling height.
For example, a 12-by-10-foot bar with an 8-foot ceiling has approximately 352 square feet of wall area. Treating 20% of the wall area requires about 70 square feet of panels. Eight 24-by-48-inch panels provide 64 square feet; adding a ceiling cloud or two smaller panels brings the room close to the target.
In an open-plan space, do not calculate only the bar counter footprint. Treat the surrounding conversation zone as part of the acoustic room. Start around 25% coverage and increase it if voices remain difficult to understand or music spills into nearby rooms.
Mounting method matters more than many buyers expect
- Direct wall mounting: Use for 1–2 inch panels when wall space is limited. It is simple and compact, but gives less low-frequency benefit.
- Spaced mounting: Use cleats, standoffs, or a frame to create a 1–2 inch air gap behind the panel. This is one of the most useful upgrades for thicker panels.
- Ceiling cloud: Suspend a panel horizontally above the bar seating or speakers. A cloud treats reflections from the ceiling and can reduce the hard, noisy quality created by stone counters and tile floors.
- Freestanding panels: Use movable screens in open-plan rooms or rentals. They can divide the bar from the living area and be repositioned for parties.
- Adhesive mounting: Suitable only when the manufacturer approves it and the panel is light enough for the surface. Adhesive can damage paint and is a poor choice for heavy panels or textured walls.
Decision matrix: match the panel to your priorities
| Priority | Choose | Avoid | Why |
|---|---|---|---|
| Lowest cost | Targeted 2-inch panels | Covering the room with thin foam | Fewer effective panels outperform broad, weak treatment |
| Rental-friendly installation | Light PET-felt or freestanding panels | Large cleats and permanent anchors | Removal is easier and wall damage is limited |
| Music and karaoke | 3–4 inch broadband panels with air gaps | 1-inch decorative panels alone | Greater depth helps with lower frequencies |
| Visual integration | Fabric-wrapped panels or patterned PET felt | Uncovered mineral wool or mismatched foam tiles | The treatment looks intentional and remains safer to handle |
| Sound traveling to another room | Absorption plus door seals and construction improvements | Expecting panels to provide soundproofing | Absorption reduces reflections but does not block structural transmission |
Installation sequence for a better result
- Identify the loudest source. Mark the speakers, television, counter, and main seating positions before buying panels.
- Treat early reflections. Place panels on the side walls between the speakers and listeners, then add one above the seating or bar.
- Break up parallel reflections. Avoid putting every panel on a single wall. Distribute treatment between opposing walls and the ceiling.
- Leave practical clearance. Keep panels away from splashing sinks, steam, direct heat, and areas where chairs or bottles will strike them.
- Reassess after furnishing. Curtains, upholstered stools, rugs, and full shelves also absorb or scatter sound. Add panels gradually rather than treating every surface at once.
Ownership, cleaning, and common mistakes
Fabric is usually the first visible part to wear. It can collect dust, absorb odors, or become marked near a bar counter. Choose removable, cleanable fabric where possible and vacuum gently with a brush attachment. Do not saturate fiberglass or mineral-wool panels with liquid; moisture can stain the fabric, weaken adhesives, and create a drying problem.
The most common mistake is buying by thickness alone. A 2-inch panel with a documented NRC rating and a useful air gap may outperform a decorative product advertised as “acoustic” without test data. Another mistake is treating only the wall behind the bar. That wall may look attractive, but the ceiling and side-wall reflection points often contribute more to the room’s echo.
Also check the panel’s fire-performance documentation, edge construction, hanging hardware, and weight. A 24-by-48-inch rigid panel may weigh several pounds, and a ceiling cloud needs secure anchors suited to the ceiling structure—not just drywall plugs.
Final verdict
For the majority of home bars, choose 2-inch fabric-wrapped fiberglass or mineral-wool panels with an NRC of 0.85 or higher, buy enough to cover about 20–30% of the relevant wall and ceiling area, and space at least some panels off the wall. Move to 4-inch broadband panels when music, bass, or an open-plan layout dominates. Decorative PET felt is a strong design-led supplement, while thin foam is best treated as a limited high-frequency fix rather than the complete answer.




Write Your Review
No reviews yet. Be the first to share your experience!